
Reveal! My small but blissful guest bathroom
Hey, I’m continuing with my house tour today. I revealed the Master Bathroom remodel a while back and now it’s time to shine a bit of light on the tiny Guest Bathroom. It’s a small bathroom situated downstairs, next to the kitchen.
It doesn’t get much light, and is usually dark even on the brightest of days. So my goal of the guest bathroom design was to brighten it and turn it into a restful place. But I didn’t want it to be boring. Nor loud. I mean it doesn’t need to be loud to be visually interesting, IMHO. It was a delicate balance and quite the challenge.
First, let’s take a look at what I had to deal with.
BEFORE

It had mosaic in red-yellow tones, beige floor tiles, 1×2′ white wall tiles and the cement encased row of pebbles which I loathe.
The window opens out to a covered yard, which doesn’t provide much sunlight. But better than none, I guess.
On the vanity was a bowl sink and granite countertop. Both were still in good condition, so I reused them. 

Related: Jules’ house tour – the master bathroom remodel
The structure and flow of the bathroom stayed the same. I replaced the bathroom tiles and changed out the wooden undersink cabinet, which was falling apart.
I’ve written a post previously on choosing bathroom tiles and how tough it actually is. So many mind boggling options! In that post, I also showed the plans for the guest bathroom design which Charlotte from Feruni Ceramiche plotted out for me. In the end, I chose Option 1 with triangles but changed out the floor tiles for a lighter coloured tile.
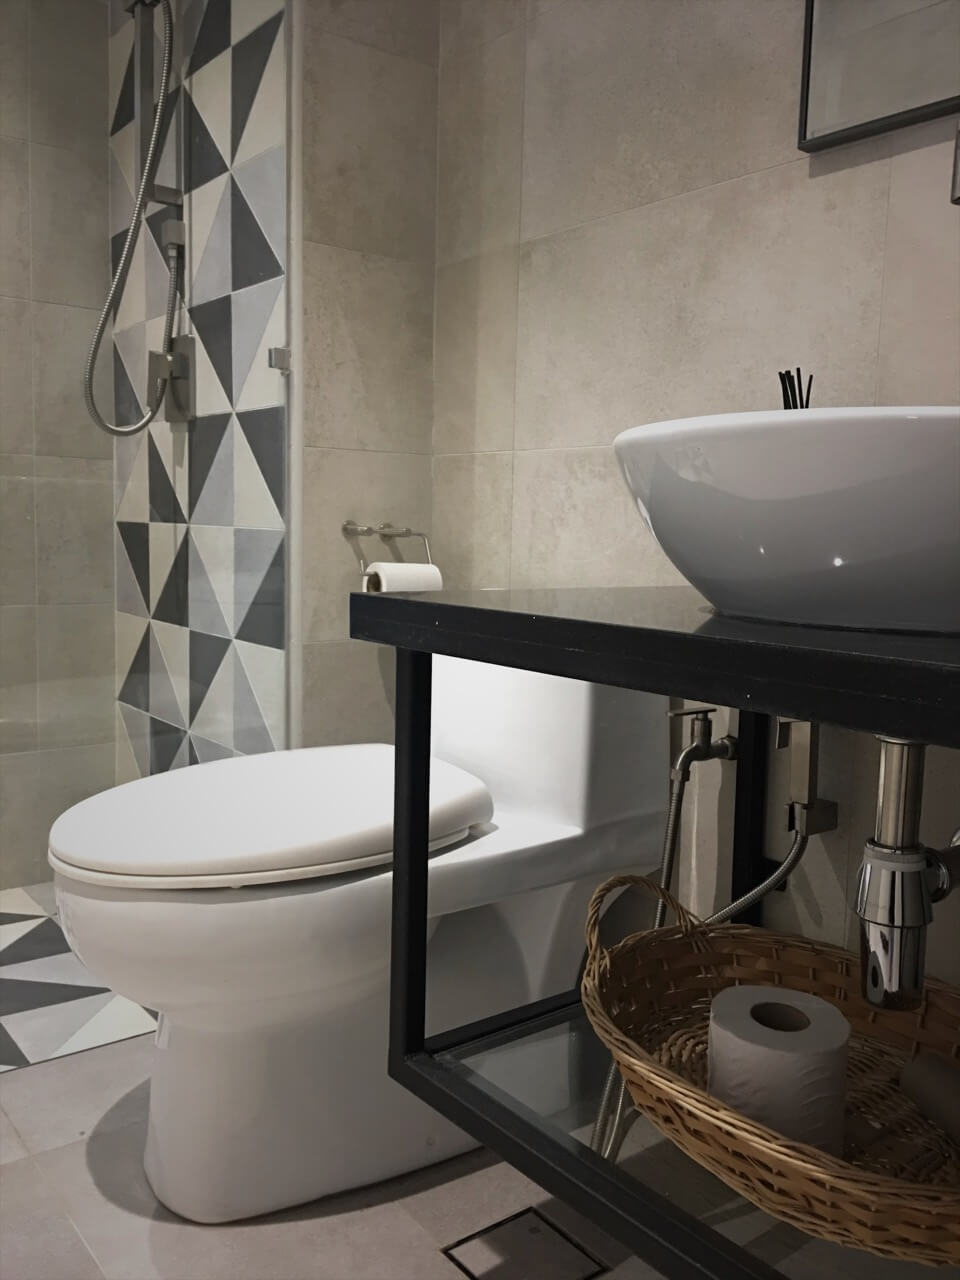
Guest bathroom design – AFTER

I went with the Cemento 2.0 range from Feruni. I liked that they were not smooth tiles but carried a subtle texture. From the range, I picked 3 different but complementary shades. The walls are a sandy beige, floor a light grey and for accent, we went with black.

The triangles were also cut from the same 3 shades of Cemento tiles. We also kept the triangle accent within the shower enclosure. It’s a nice attention grabber when one walks into the bathroom.

Like in the master bathroom, I had a wall-mounted steel frame fabricated for the sink and countertop.

Although the frame takes up the exact same footprint as the wood cabinet it appears much “lighter” than the cabinet. Here’s a side by side comparison.

For a small bathroom, I think it works really well. Unless you have a lot of stuff you rather not see, then closed storage might be better.
Not easy to capture a good shot, but here’s one photo of how it looks overall.

Still needs some faux plants to complete the “bliss” aspect of the bathroom. What else can I do to make it even more spa-like? Tell me in the comments.
Guest bathroom design sources:
(I live in Malaysia, suppliers are local):
- Tiles – Feruni Ceramiche
- Walls – Cemento 2.0 Series (CT01B)
- Floor – Cemento 2.0 Series (CT03B)
- Triangles – Cemento 2.0 Series (CT01B, CT03B, CT04B)
- Concealed shower mixer and shower bar set – Tora (from BigBath)
- Toilet paper holder – Tora (from BigBath)
- Hand bidet – Tora (from BigBath)
- Basin mixer – Tora (from BigBath)
- Sink – salvaged
- Metal countertop mount – custom made
- Granite countertop – salvage
- Mirror – salvaged
Let me know if you have questions. Happy to answer them.
Next update will be on my kitchen. Till then, happy hacking!
The tiles are gifted by Feruni Ceramiche but opinions are entirely my own.


It’s just terrific…I love it! Definitely add some plants. You could even hang a moisture loving vining plant in the window. How about a candle sconce with several candles (battery or wicks) on the wall above the toilet?
A moisture loving vining plant – that sounds perfect.
Definitely gorgeous! I wouldn’t add too much, or you’ll disturb the modern asthetic too much. So you don’t have to drill into your (incredibly free-of-charge!) tiles, how about hanging open air plant hangers at various heights from the ceiling so that they skim the wall? This is just a random link, it won’t let me share a pic. And BTW, your family is crazy! This is an awesome bathroom!
Thanks Amanda. Ooh, I do love those hanging planters.
Yeah, they are crazy that way. 🙂
Gorgeous..love the triangle tiles….I agree with Cheryl, a hanging plant and a few candles above the toilet would complement the spa look. The only thing I would change is to place some rolled “guest towels” (smaller towels) in the basket under the sink, (place one spare roll of toilet paper on that shelf above the toilet) …and have a small basket under the sink for guests to “dispose” of the towels once used, it would really look like a spa…
Lovely tips.
Is there a shower curtain or glass enclosure? How do you keep rest of bathroom dry when showering?
There is a glass screen covering about half the shower area. The rest of the bathroom does get a bit wet after a shower.
Love this! It is fresh and clean without any fussiness. I think that I would have opted for glazed glass just for privacy-my only criticism. Otherwise, it is perfect! Your relatives should’ve enjoyed the use of a brand new bathroom!
I did consider that but the budget ran out. lol. So privacy film will have to do for now.
I LOVE your remodel and think it’s blissful indeed! The only thing missing, imho, that would make it more accessible to users would be some kind of shelving or hanging basket in the back corner of the shower that would make it possible for a bather to reach for body wash, shampoo, and a pouf without having to bend over. I’m picturing one of those tiered hanging market baskets hanging from the ceiling by a chain or even one of those corner poles with shelves designed for small showers. In both cases, once you have figured out how long you want them, you can help to rust proof them by spray painting them with a rust protecting spray paint in either clear or a coordinating color. It’s just a thought. If you do the baskets, you could even put a lush faux plastic fern in the top basket (or maybe even a real one, or a Golden Pothos or something that’s really durable and grows like crazy) and reserve the lower one for the shower accessories.
You are right, Laura. I’ve been shopping for a shower shelf or basket but have yet to find one I really like yet (at a price I like too). So … but yes, the bathroom needs one. And your tiered hanging idea is a great. Must look harder now that I know what I should look for.
Hi, again — one other question — why are the faucet controls placed so high on the wall? That might be a bit of a reason why people don’t want to use the shower, too. It’s still beautiful, though, and such an improvement over the original! I also love the way you used the frosting film on the windows to provide privacy while still allowing light through — so much nicer than that silly shade!
Those you see high up are the controls for the main water inlets. To use the shower, I have a mixer at waist level. See below the shower head.
Glad you noticed the frosting film. The shade was one of the first things to go. It just didn’t make sense. 🙂
I was wondering the measurements of your tiny bathroom. I’m thinking of expanding my current half bath to add a shower in an existing closet. I think the footprint would be similar to yours which is beautiful!
Sarah, mine is 5′ x 7′.
Love what you’ve done with the place, but I would opt for textiles. A nubby textured rug, some fluffy towels, will add a lot of textural interest and can be white or some shade of gray to tone in with everything else. And, yes, a small drapey plant (or a series of them at different heights) hanging in glass pots inside the window frame would definitely contribute to the “spa” serenity that you are going for.
Exactly what I’m thinking of with the plants in the window frame.
Definitely came out amazing!!! Once you add plants and some soft items ..sumptuous towels etc. Its perfect!
Those are definitely in the list. Thanks Elizabeth.
charming work. wondering where the shower drain is. Directly under the faucet/head & controls? I wonder if you might be able to direct more light into the windows& thus the bathroom, with some inexpensive mirrors placed outside in the covered yard…
Thanks Lars. The shower drain is below the controls. You can see a glimpse of it in the 5th photo. I used a in tile drain, something like this – https://amzn.to/2VnjAf5 – so I can use the tile as the drain cover.
Thanks for the tip on the mirror. Definitely will experiment with that.
Hi may i know where do you customize the metal counter top?